


Table of Contents
Introduction
Push code to GitHub using HTTPS and SSL — this is one of the most essential skills every developer needs today.
If you’ve ever tried to push your project code to GitHub and faced authentication or SSL errors, you’re not alone. Many beginners struggle with HTTPS setup, SSL verification, and Git reinitialization issues.
In this detailed tutorial, we’ll go through every step of connecting, securing, and pushing your code to GitHub — the right way — using HTTPS and SSL. You’ll also learn how to fix common HTTPS errors, create new branches, and manage code pushes confidently.
By the end of this guide, you’ll know how to:
- Understand HTTPS and SSL in GitHub
- Configure Git with HTTPS + SSL securely
- Create and push code to your own, main, or master branch
- Fix SSL and HTTPS authentication problems
- Solve the “repository already exists” reinitialization issue
Let’s begin 👇
What Are HTTPS and SSL in GitHub?
🔸 What Is HTTPS?
HTTPS (HyperText Transfer Protocol Secure) is the secure version of HTTP. When you use HTTPS in Git, your data (like commits, push requests, and authentication tokens) travels encrypted between your computer and GitHub servers.
This means no one in between (like on Wi-Fi or a proxy network) can read your credentials.
Example HTTPS URL:
https://github.com/username/repository-name.git
Whenever you push code via HTTPS, Git uses your username and Personal Access Token (PAT) for authentication.
🔸 What Is SSL and How It Works?
SSL (Secure Sockets Layer), now replaced by TLS (Transport Layer Security), is the encryption layer used in HTTPS.
When you connect to GitHub using HTTPS, an SSL handshake happens:
- Your Git client requests a secure connection.
- GitHub sends an SSL certificate proving it’s authentic.
- Your computer validates that certificate (using CA — Certificate Authority).
- Once validated, all communication (push, pull, clone) happens securely via encryption.
If the SSL verification fails (like expired certificates or wrong CA), you’ll see errors such as:
SSL certificate problem: unable to get local issuer certificate
That’s why SSL verification is critical for Git’s secure data transfer.

Step 1: Install and Configure Git
Check if Git is already installed:
git --version
If not, download and install it from https://git-scm.com/downloads
Then configure your identity:
git config --global user.name "Your Name"
git config --global user.email "your.email@example.com"
To confirm:
git config --list
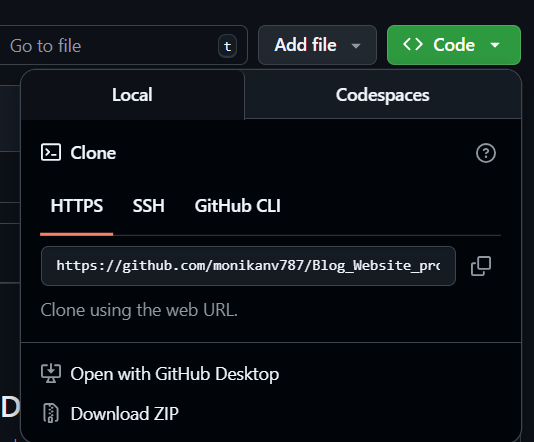
Step 2: Connect to GitHub Using HTTPS
🔸 Clone an Existing Repository
git clone https://github.com/username/repository-name.git
This downloads your repo to your local system.
🔸 Or Initialize a New Repository
mkdir myproject
cd myproject
git init
Then connect it to GitHub using HTTPS:
git remote add origin https://github.com/username/repository-name.git
To verify:
git remote -v
Step 3: Configure HTTPS Authentication with SSL and Token
GitHub no longer supports passwords for HTTPS authentication — you must use a Personal Access Token (PAT) secured with SSL.
🔸 How to Generate Your Token
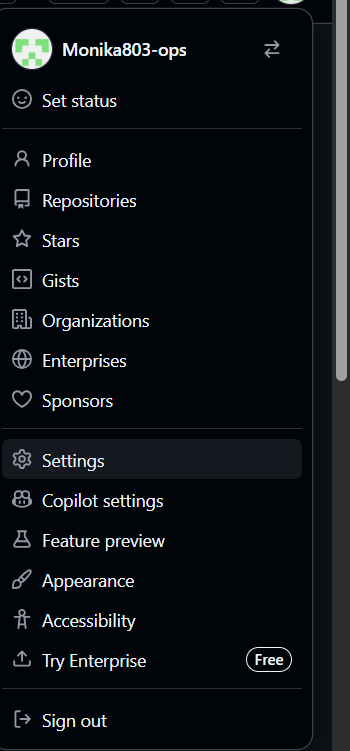
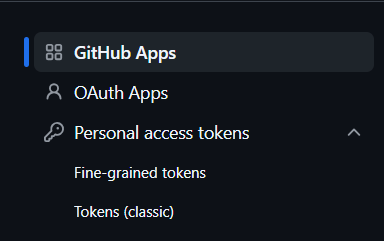
- Go to GitHub → Settings → Developer settings → Personal access tokens → Tokens (classic)
- Click Generate new token
- Select scopes:
repo(full repository access)workflow(if needed for CI/CD)
- Generate and copy the token — you’ll need it only once.
Step 1: Go to GitHub Settings
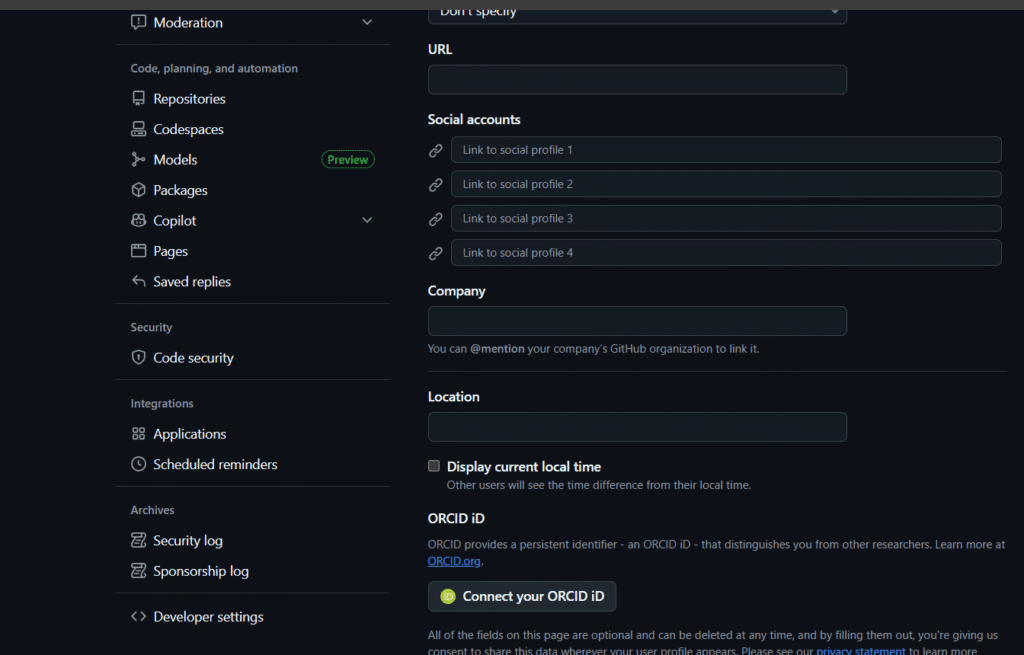
Step 2: Go to Developer Settings
Step 3: Open Personal Access Tokens → Tokens (Classic)
Step 4: Click Generate New Token

🔸 Using Token and SSL in Git
Now push your code once. When prompted:
Username: your-github-username
Password: your-personal-access-token
To store it securely:
git config --global credential.helper store
This saves your SSL-authenticated credentials locally (encrypted).
Note: If your company uses a proxy, Git’s SSL handshake might fail — fix this using system certificates (explained below in error section).
Step 4: Create a New Branch
Creating branches allows safe experimentation.
git checkout -b feature-branch
To list all branches:
git branch
Switch branches easily:
git checkout main
Step 5: Add and Commit Your Code
Add all files:
git add .
Or specific ones:
git add index.html
Then commit your changes:
git commit -m "Added homepage design"
Step 6: Push Code to Your Own Branch (HTTPS + SSL)
Push your new branch to GitHub:
git push -u origin feature-branch
origin= remote repository namefeature-branch= branch you created-u= links your branch for future pushes
Now your feature branch is visible on GitHub.
Step 7: Push Code to Main Branch
Merge your branch into the main one:
git checkout main
git merge feature-branch
git push origin main
Step 8: Push to Master Branch (Older Repos)
If your repo still uses master:
git checkout master
git add .
git commit -m "Updated files"
git push origin master
Step 9: Common HTTPS/SSL and Git Errors (With Fixes)
1. Authentication Failed
Error:
fatal: Authentication failed for 'https://github.com/...'
Cause: Passwords are deprecated.
Fix: Use Personal Access Token.
Clear old credentials and retry:
git credential reject https://github.com
git push origin main
2. SSL Certificate Problem: Unable to Get Local Issuer Certificate
Cause: Git can’t verify GitHub’s SSL certificate (common on corporate or proxy networks).
Temporary Fix (not secure):
git config --global http.sslVerify false
Permanent Secure Fix:
- Install/update CA certificates:
sudo apt install ca-certificates git config --system http.sslCAInfo /etc/ssl/certs/ca-certificates.crt - Restart your terminal and retry pushing.
3. Remote: Repository Not Found
Cause: Incorrect URL or missing access permissions.
Fix:
git remote set-url origin https://github.com/username/repository-name.git
Then retry:
git push origin main
4. Repository Already Exists / Cannot Reinitialize
Scenario:
You deleted your GitHub repo, re-created it with the same name, and then ran:
git init
Git shows:
fatal: remote origin already exists
or
error: repository already exists
Cause:
Your local project still has an old .git folder linked to a previous remote origin.
Fix (step-by-step):
- Check your remote:
git remote -v - If the URL is outdated, remove it:
git remote remove origin - Reconnect to the new repo:
git remote add origin https://github.com/username/repository-name.git - Reinitialize Git (if needed):
rm -rf .git git init git remote add origin https://github.com/username/repository-name.git git add . git commit -m "Initial commit" git push -u origin main
This completely resets your repo connection and fixes the “repository already exists” error.
Bonus: Understanding SSL Key and Certificate in Git
When you use HTTPS, Git automatically uses your system’s SSL certificate to encrypt communication.
If you’re using custom SSL certificates (for enterprise GitHub or GitLab servers), you can manually set them up:
git config --system http.sslCAInfo /path/to/custom/cacert.pem
For self-signed certificates:
git config --global http.sslVerify false
(but this should be temporary — unsafe for production)
Tip: In organizations, admins often distribute a
.pemfile (SSL certificate). Install it in your Git config to avoid SSL trust issues.
Step 10: Best Practices for HTTPS + SSL GitHub Connections
- Always use Personal Access Tokens instead of passwords.
- Regularly rotate tokens every 90 days.
- Keep your SSL certificate store updated.
- Before pushing code, always run:
git pull origin mainto avoid merge conflicts. - Use meaningful commit messages for traceability.
Conclusion
You’ve now mastered how to push code to GitHub using HTTPS and SSL — safely, securely, and professionally.
You learned:
How HTTPS and SSL encrypt communication
How to set up Git authentication using tokens
How to create and push branches
How to fix SSL, authentication, and repository errors
By following these steps, you can confidently work on any GitHub repository — from college projects to professional DevOps pipelines — without fear of connection or SSL issues.
You May Also Like
If you found this blog interesting, you might enjoy exploring more stories, tips, and insights in our